By Luke Rocco
March 2010
In this tutorial we demonstrate how to make use of Resource Files using the DotNetMushroom RAD module in order to provide Multi Language functionality to the Forms.
This article is a continuation of the
How to Implement Multi-Language Using DotNetMushroom RAD article. In the previous article, we discussed how DNM RAD handles Multi Language Data within Forms. However, in this article, we will be setting up the News Application to make use of Resource Files in order to provide Multi Language functionality to the Forms.
Introduction
Before attempting this tutorial it is recommended to follow the first three tutorials regarding the DotNetMushroom RAD Module, this article continues from the previous articles.
In order to understand the way DNM RAD handles Resource Files, please make sure that your DotNetNuke installation is setup to make use of at least two languages, as described in the previous article.
Also, you need to have a basic understanding of XML in order to be able to create and edit the Resource Files. Should you need to freshen up your XML Skills,
visit the following website for a rundown of the basics.
Preparing the Application to make use of Resource Files
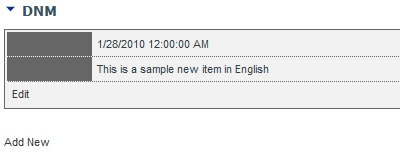
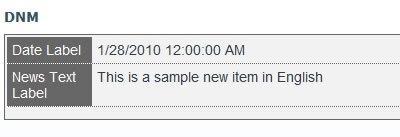
The following are two screen shots of different News Items, one in English and the other one in Italian.
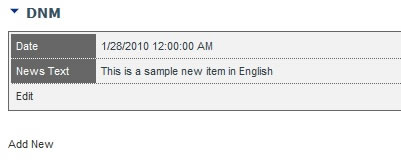
English language is selected.
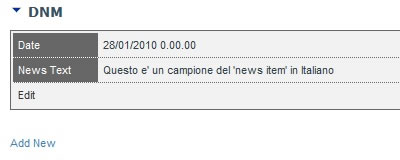
Italian language is selected..
As can be seen in the above images, only the entries which are registered to the currently selected language are being displayed, however, the Labels of the Form, ‘Date’ and ‘News Text’, are not changing their language.
By making use of resource files, it is possible to have the above mentioned Labels change according to the language currently selected by the user. In order to implement resource files, we need to make some minor changes to the previously built forms.
Step 1: Setting up the Form Labels
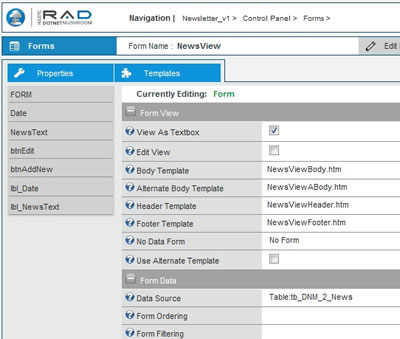
First we need to access the DNM RAD Control Panel, next click on the Forms Tab. Once the control panel loads, we need to click on the Form named ‘NewsView’.
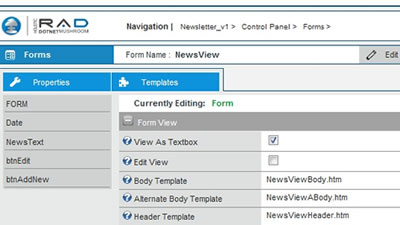
DNM RAD ‘NewsView’ Form
As can be seen in the above image, the form only has four controls. Two of the controls are Buttons, while the other two are a Date Control and a Textbox, which are used to provide the user with the means to input the required data. In order for the Forms to support ‘fully’ the multi language features which are unlocked by the use of Resource Files, we need to insert DNMLabel Controls.
Thus, we need to click on the Templates button and edit the page source.
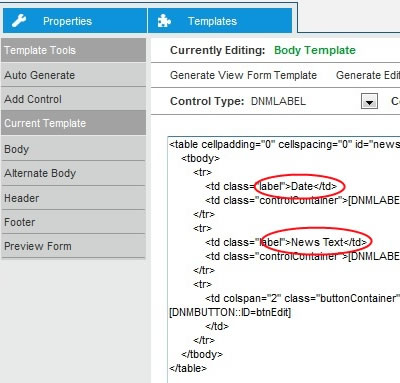
Body Template
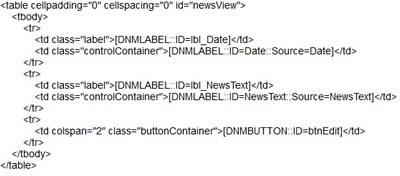
As can be clearly seen in the above image, the ‘title’ of each field is not a DNMLABEL, but is hard coded in the Form as ‘Date’ and ‘News Text’ respectively. We need to replace the two ‘titles’ with a DNMLABEL which will then allow us to manipulate it by using Resource Files.
We need to replace the title 'Date' with
[DNMLABEL::ID=lbl_Date] and the title 'News Text' with
[DNMLABEL::ID=lbl_NewsText] and click Save. Once the form saves, we should have the following Form source code.
Updated source code
Next, we need to switch back to the Properties Tab. As can be seen below, we now have two new controls available in the form, lbl_Date and lbl_NewsText.
Updated ‘NewsView’ Form
As it is now, the form will not display anything in the Label controls. We now need to enter some default text in order for us to be able to make sure that the form is working as expected.
News Item without any default text entered for the Labels
In order to do this, we need to click on the Controls, and enter and save the default text in the ‘Label Text’ property of the label controls, as seen in the below images.
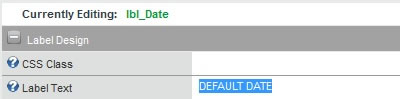
Default Text for lbl_Date label control
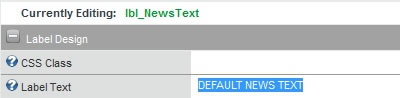
Default Text for lbl_NewsText label control
Once we have entered and saved the default values for the label controls, we can refresh the Form in order to make sure that our changes have been successfully implemented.
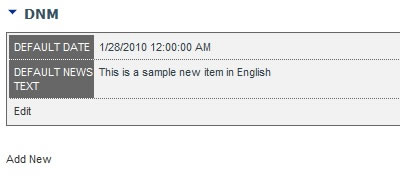
News Item with the Default Text entered for the Labels
Step 2: Enabling Resource Files
Once we have the Form ready, with the proper Label controls setup, we can proceed with enabling the Resource Files for the Form. In order to do this, we need to access the Form Properties and scroll down to the Form Multi Language section.
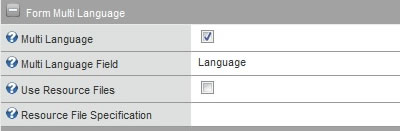
Undefined form Multi Language properties
We need to make sure that the ‘Use Resource Files’ checkbox is checked and that the ‘Resource File Specification’ property contains the Name of Form in question. Later on in the article we will discuss this property in further detail, but for now we should enter the name of the Form which is ‘NewsView’.
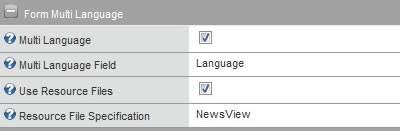
Defined form Multi Language properties
Step 3: Creating the Resource File
Now let’s create the resource files which will be used by the form to handle Multi Language labels. DNM RAD makes use of XML Files which conform to the following schema file.
Download DNM ResourceFile.xsd
Let us create an XML Resource File which will handle the English Language Labels for the ‘NewsView’ form. We start off by creating a new XML file named NewsView, and open it using Notepad or any other basic text editor.
In the first line we enter the XML Declaration
<?xml version="1.0" encoding="utf-8"?>. Next we create the Root Node and name it appropriately
<root>. We should have the following XML data in our file:
<?xml version="1.0" encoding="utf-8"?>
<root> </root>
Next we need to add an element named 'forms'. This element needs to have an attribute named 'language' defined. This attribute is used to define the language to which the ‘form’ elements described within the ‘forms’ will refer to. For now, enter ‘default’ in the ‘language’ attribute, but we will discuss this attribute further later on.
<?xml version="1.0" encoding="utf-8"?>
<root>
<forms language=”default”> </forms>
</root>
As mentioned above, within the ‘forms’ element, which specifies the referenced language, we will then enter the ‘form’ element. This form element needs the ‘name’ attribute, which will specify to which Form this element refers to. In our case we will enter ‘NewsView’, as such we should have the following xml data.
<?xml version="1.0" encoding="utf-8"?>
<root>
<forms language=”default”>
<form name=’NewsView’> </form>
</forms>
</root>
Within the ‘form’ element we need to insert a parent element named ‘controls’ and within it we need to insert the ‘control’ elements which will refer to an individual control which is present in the form. In order to be able to discern which control is being referred by each element, we need to append a ‘name’ attribute to each ‘control’ element, specifying the name of the control in question.
In our case, we need to specify the custom values for two Label controls, ‘lbl_Date’ and ‘lbl_NewsText’. At this point we should have the following XML data.
<?xml version="1.0" encoding="utf-8"?>
<root>
<forms language=”default”>
<form name=’NewsView’>
<controls>
<control name=’lbl_Date’> </control>
<control name=’lbl_NewsText’> </control>
</controls>
</form>
</forms>
</root>
Within each control we can have multiple properties defined, as such, we need a parent element to contain each property. This element needs to be named ‘properties’ and its children need to be named ‘property’. Each ‘property’ element needs to have two attributes, ‘name’ and ‘value’.
The ‘name’ attribute needs to contain the name of the property to be influenced, while the ‘value‘ attribute will define the value which will be imposed on the control’s property.
In order for us to be able to overwrite the contents of the Label controls, we need to overwrite the TEXT property of each control. In order to do so we need to set the ‘name’ attribute to ‘Text’ and then define the ‘value’ appropriate to the language being used.
For now, we will default the language to English, so that the above mentioned ‘form’ element will contain the following XML data.
<controls>
<control name=’lbl_Date’>
<properties>
<property name=’Text’ value=’Date Label’/>
</properties>
</control>
<control name=’lbl_NewsText’>
<properties>
<property name=’Text’ value=’News Text Label’/>
</properties>
</control>
</controls>
Now that we have defined the properties for the controls present in the ‘NewsView’ Form, we can consider the Resource File complete. We should have managed to get an XML Resource File similar to the following file.
Download Sample_01.xml
Step 4: Deploying the Resource File
Next, we need to make sure that the Resource File is in a location where DNM RAD can make use of it. If you navigate to the Portals Folder, and access the DotNetMushroom folder, you will notice that DNM RAD has created a directory named ‘Resources’.
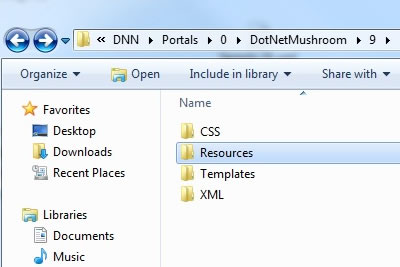
DNM RAD Resources Folder
It is in this directory that we should place our XML Resource File, and we need to make sure that its name is exactly as that specified in the above mentioned ‘Resource File Specification’ Form property, with the ‘.xml’ postfix. In our case, we should make sure that the resource file is named ‘NewsView.xml’.
If everything has been setup correctly, then the Form should display as follows:
Resource File dependant labels.
And there you have it. Resource File dependant label values. But our work is not over yet. We have to make the above form Language Dependant. As such, we only have a few steps to carry out.
Step 5: Setting up for Multi-Language
Open up the XML Resource file we have previously created, and you will see the following screen, or something similar, depending on the Text Editor you use.
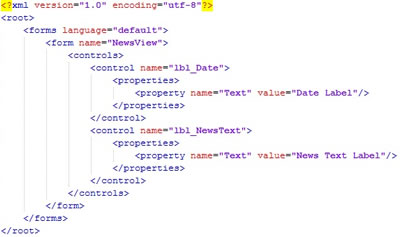
The Basic Resource File
Now, we have to copy and paste the ‘forms’ element two times, so that you will end up with three identical elements complete with inner child elements and attributes. Next, we’ll rename the ‘language’ attribute for the second to ‘en’ and the third element to ‘it’. We should have the following (the final Root node is not omitted, but is just out of viewable range):
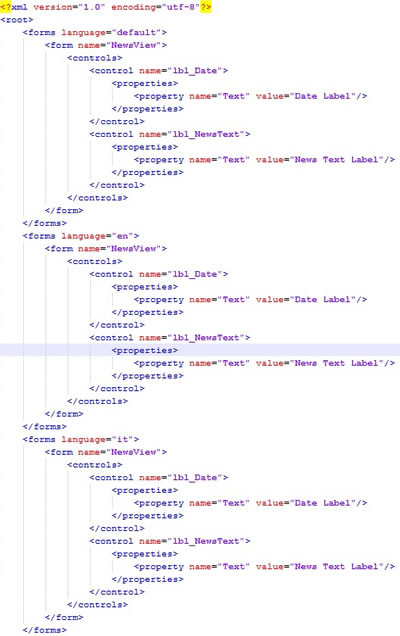
The Resource File containing three ‘forms’ element
All that is left is for us to replace the ‘value’ attributes of each control property in order for it to make sense to the language in question. As you might have already figured out, ‘en’ refers to English, and ‘it’ refers to Italian. We should have managed to get a resource file similar to the following XML file:

Download Sample_02.xml
The ‘default’ element is used by DNM RAD when a yet to be configured language is requested. Make sure to have a ‘default’ element on which DNM RAD can fall back on, in order to avoid loading the data specified in the DNM RAD Control Panel, unless required otherwise.
Once the Resource File is updated and saved, we can view our results by accessing the NewsView form in the browser. Try changing the locale, and you should see the different text load according to the selected locale.
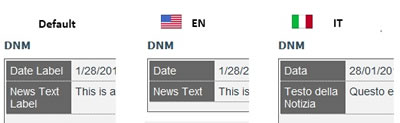
Same Form, different Languages
Comments